Sunday, December 25, 2011

Christmas is here!

Merry Christmas everyone!

I hope everyone is having a wonderful holiday and spending it with the people they love! Sorry my posts have been slower these days-- I've been pretty busy preparing for the family holiday party that just ended. There were a lot of people, great food and fun!

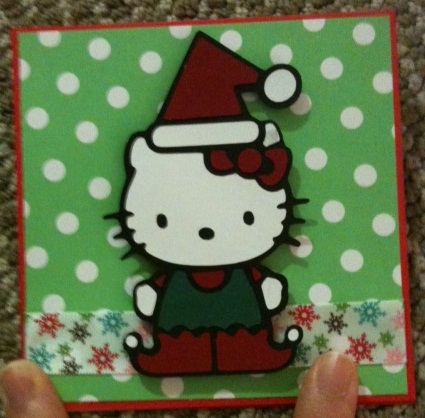
Here is a simple card I put together a while ago:
5X7 card

Materials used:
- White cardstock 10X7
- Blue cardstock 4.75X6.75
- The All Grown Up matstack
- White border w/ Martha stewart edge punch
- Cuttlebug: Musical florish (on white border)
- Sweet treats flower blue cut at 3.25 in
- Sweet treats flower white cut at 3 in
- Sweethearts bell cut at 2 in


-American Crafts ribbon


Thanks for stopping by!
Happy Holidays!

Tuesday, December 20, 2011

Tag Ornaments

I've been seeing many neat ideas in stores where they have ornaments hanging on their cards. I thought this would be a really fun idea to try and decided to make it a challenge.
This card was actually really complicated for a new scrapper like me to make because I lacked some supplies... thankfully I was still able to put together this fabulous card through some tearing and punching! ;)


Materials:
- The All Grown Up matstack
- White cardstock, embossed with swiss dots folder
- Celebrate it gold ribbon
- American crafts blue/white ribbon
- bird tags cut at 2 in
- Joy word cut at 1.5 in


So the most annoying part about this card was the fact that I had to take a brad end and punch a hole wide enough for the blue/white ribbon to slip through... I ended up bending the tag a little big but I guess it's not too obvious. haha. woohoo!

I also used a little bit of super glue to keep the blue/white ribbon from "poofing" up all the time. hehe.

Thanks for stopping by!

p.s. has anyone ever had a 'bad cricut day'? I've been experiencing that lately where none of my cuts or ideas have been working right! Gets me so frustrated that I want to rip up things!

Saturday, December 17, 2011

Another Square Card

So the base of this card was actually supposed to be the base of the Mouse card (previous post) but I had accidentally cut this base a little smaller than I wanted... -_- haha, but since I hate to waste a perfectly fine piece of cardstock, I decided to make another card with it.


Materials used:
- Deep Blue cardstock 12X5.5
- Patterned cardstock 5 7/8 X 5 3/8
- Gold/yellow cardstock 4.5X4
- Light blue cardstock 4 3/8 X 3 7/8
- 4 You present cut at 2.5 in
- American Crafts ribbon


anddd of course I added some glitter to give the present a sparkle =)


Thanks for stopping by!

Thursday, December 15, 2011

A Christmas Mouse

Hello!
I got tired of making the usual standard A2, A7 cards and wanted to spice things up some more.
Here is square card I made of a Christmas mouse. Ain't he cute?? I love his big pink ears =D


Ingredients:
- Blue cardstock 6X6 & 4.5X4.5
- Pattern cardstock 5.75x5.75 
- White cardstock 4.25X4.25
- Mouse critter cut at 2.5 in
- Scarf cut at 1.5 in 
- Tree cut at 4 in
- Lights cut at 0.75 in
- Star (from the horse critter) cut at 0.75 in
- Sun cut at 1 in
- Embossing folder: Swiss dots
- Celebrate it Ribbon: Valentine

Enjoy!
Look out for some awesome cards coming soon =)

Monday, December 12, 2011

Hello Kitty Christmas Card III- My first easel card!

During the past week or so, I have been seeing many easel cards and got inspired to finally make one!
I've always wanted to make an easel card but have always thought they were hard to make. After reading and watching some tutorials, I realized they are not hard to make at all!

Here is my simple Christmas themed easel card.


Materials used:
- Red cardstock 4X12
- pattern cardstock 1/10 smaller than 4X4
- Hello Kitty cut at 3.5 in.
- American Crafts Ribbon


- Martha Stewart edge punch
- Merry Christmas cut at 1 in.
- Pattern cardstock 1.5X 1/10 smaller than 4in
- Manila cardstock 2 in 


I was actually a bit surprised how small this easel card is. There isn't really much room to write anything inside.... I guess these types of cards are more for 'show'


Friday, December 9, 2011

Hello Kitty Christmas Card II

Here is another Hello Kitty Christmas card I made.
I made this card so I could use my cuttlebug and embossing folders. hehe.

I did something different with my card by using my friskers corner punch. To be honest, I am not very satisfied with this corner punch. It's hard to get a good smooth punch unless I flip the paper and do the punch again. I paid around $7 for it and I felt like I got ripped off!

This is a 5X7 card:

Materials used:
- Green cardstock 10X7
- Red cardstock 6.75X4.75
- White card stock 4.75X3.5 & torn for snowy effect
- Hello kitty cut at 6 in.
- Embossing folders: Musical Florish (red) & Swiss dots (white)


Stamping from: Kaisercraft Clear Stamp: Be Merry


You know what I really want for Christmas this year?
I really want to find a site that allows you upload a picture to make a personalized stamp. I would love to have one so I can start stamping the back of my cards!

Thursday, December 8, 2011

Hello Kitty Christmas Card I

Here is my first Hello Kitty Christmas card.


Isn't she adorable?
Too bad I made it an awkward size... I was afraid it wouldn't fit on my 12X12 cricut mat so I cut her out at 6 inches. Turns out I actually had more room and now the card is too big for my A2 envelope and slightly too small for my 5X7 card envelopes. haha oh well, you live and you learn. =)

Thanks for stopping by!

Tuesday, December 6, 2011

Rudolph in the Snow

Hello Everyone~

I wanted a to make a more detailed Christmas card and came up with this:


This is an A2 card


<-- I tore the white cardstock to make it look like snow hehe


Materials used:
- Green cardstock 5.5X8.5 & 4.25X3
- Red cardstock 5.25X4
- Blue cardstock  4X2.75
- Tree cut at 2.5 in
- Star (from horse critter) cut at 0.5 in.
- Deer cut at 2 in
- Snow (from Joy phrase) cut at 0.75 & 0.5 in
- Scarf (from reindeer critter) cut at 1.5 in
- Nose (from reindeer critter) cut at 2 in.
- Embossing folders Musical Florish (on red) & Swiss dots (on white)
- Celebrate it ribbon: Holidays
- and of course...glitter glue!

Thanks for stopping by!
Feel free to leave a comment =)

Sunday, December 4, 2011

A Dog's Christmas Wish

I made this Christmas card for a couple who are dog lovers.
This is my first card using the new cuttlebug I got! =D

This is an A2 card...isn't this terrier the cutest thing??

Materials:
- Blue cardstock 5.5X8.5
- White cardstock 5.25X4
- Terrier critter cut at 3.5 in
- Scarf cut at 3 in
- Bone cut at 0.75 in
- Quote box cut at 1.5 in
- Embossing folder: Swiss dots
- Celebrate it Ribbon: Holidays
- Kaisercraft Clear Stamp: Be Merry


3 more weeks until Christmas!

Saturday, December 3, 2011

Easy Traditional Christmas Card

A quick and easy card from me!


Materials:
- Black cardstock 10X7 & 2.5X4
- Green cardstock 6.75X4.75 & 2.25X3.75
- Patterned cardstock: The All Dressed Up Matstack
- Joy word cut at 1.75 in


<-- I want to learn how to tie prettier bows...


Thanks for stopping by!

p.s. I have some really cute and creative cards coming up =)

Friday, December 2, 2011

First Christmas Tree

This is my first Christmas tree card. I wish I had more supplies and winter cartridges but I guess I will have to make the best of what I have!

The tree is from Hello Kitty Greetings. I tried to use the ribbon to make a 'present card' ...haha, can you tell? =P


- A 5 X 7 card.
- Green cardstock 10 X 7 & 3 X 2.75
- Red cardstock 6.75 X 4.75 & 2.75 x 2.5
- Patterned paper from The Green Stack
- Christmas tree cut at 3 in.
- Celebrate it ribbon- Holiday


Sorry for this poor photo quality.
I wanted the inside to have a 'wrapping' theme.
I think it worked...


More Christmas cards to come!

Thanks for stopping by! Please feel free to leave a comment =D

Tuesday, November 29, 2011

Series of Christmas Cards- Reindeers!

I can't believe Christmas is around the corner. Time flies by so fast!
I've been reading forums and other blogs and it seems that many people have gotten started on their Christmas cards already...I feel so behind!
This is my first year making Christmas cards with the cricut... and my new cuttlebug!!! (yay!)

I don't have many supplies but bare with me! I try to make them look cool and cute. =)

These are 5 X 7 cards.

Materials used:
- Black cardstock 10 X 7
- Green cardstock 4.75 X 6.75
- The All Grown Up matstack
- Reindeers cut at 3 in.


Ribbon used- Celebrate it- Holiday


I gave the insides a 'snowy' feel.


I also made the same card but with smaller reindeers and different colors:


Reindeers cut at 2.5 in.
Thanks for looking!

Monday, November 28, 2011

Wedding party thanks- Card III

Here is the final Bridal party wedding card I made.
I remade this card because I realized how hard it was to see the bride... it looks okay up close but from far away, it just looked like a white blob. haha


So here is the new and improved one:


and of course, I will add the pretty white flower from the previous picture card.
I think this pink silhouette is a lot better, don't you think?


pretty inside


To my dear friend, I hope you enjoyed these! I can't wait for yall's wedding =D

p.s. do you like the cropping I've finally done to my pictures???

Saturday, November 26, 2011

Wedding party thanks- Card II

Here is the second card design I made for my friend's bridal party.
I thought this design had a very sophisticated yet fun and upbeat feel to it. =]


Again, I don't have any measurements for these A2 size cards...


Look out for the last card!

Friday, November 25, 2011

Early Christmas for me!

Woohoo!
My super awesome bf got me an equally awesome present =D
So what did I get???

After doing my research on the Cuttlebug (more like getting sucked into purchasing more crafty goodies =X...) I decided that I really wanted to invest in one. The only problem was, full price is $100... which is more than a poor graduate student like me could afford! Luckily, I also discovered that almost every craft goody you purchase should never be full priced. You will always find it on sale or discounted on eBay or Amazon, etc.!

I've read on various forums and websites that you can sometimes use your 50% coupon on Provocraft/Cricut supplies at Michaels but I've found that it's super random and they usually only have a few in stores...and someone always beats me to it!!!

Then on one fateful day, one of my bff's sent me an email telling me JoAnn's was having a huge sale online! I finally got my Cuttlebug for ~$54 and also purchased some embossing folders and Christmas stamps (my first set!). They offered free shipping after spending $50.

Here is a super quick and easy Christmas card I just made with my new Christmas stamps:


-5 X 7 card.
-Green cardstock 6.75 X 4.75 in.
-Squares cut at 1.5 X 1.5 in & 1.75 X 1.75 in.
-Celebrate it Joy ribbon
-Martha Stewart edge punch


Off topic...but... did anyone get any good Black Friday deals? lol

Wednesday, November 23, 2011

Michaels Black Friday Weekend Deals

Extra 30% off on sale items and 50% off regular item on Thursday and Friday!!!
Extra 20% off sale items and 50% off regular item on Saturday!!!
Get your coupons here!

Other coupons like 50% off Martha Stewart Scoring board (which is super awesome, I love it) and 40% off ribbons here.

Enjoy!

Look out for my other bridal party thank you cards!

Monday, November 21, 2011

Wedding party thanks- Card I

So like I mentioned in my earlier posts, I have a dear friend of mine who is getting married in March, and she asked me to make her bridal party thank you cards. I was so thrilled and excited that I had to get started right away!

With so many ideas and me being color-matching challenged (haha), I told her that I would make three designs and she could chose which one she liked. To my surprise, she LOVED ALL THREE and wanted a couple of each <3

Here is the first card design I came up with.
The bride to be decided to ditch the customary wedding traditions and made her childhood male friend her "man of honor" haha, and this was the ''manliest'' card I could make =P


*Edited 11/26/11- sooo...I noticed that I actually put the wrong picture here...hahaa.. it is now correct*


So I know normally I usually have the sizings and details next to the pictures but this time my mind was so crazy with different ideas that I kept changing colors, sizes and even shapes. haha.

BUT PLEASE feel free to ask me anything..... just leave a comment below =)

Thursday, November 17, 2011

Thanksgiving Pumpkins

My last Thanksgiving card of the year.
Haha, I know, I didn't make many. =P

This is also a 7X5 Card.


Materials used:
- Brown cardstock- 10 X 7, folded at 5 in
- Orange cardstock- 6.75 X 4.75
- The Green Matstack
- Pumpkins cut at 2 in & 1.5 in
- Hello sign cut at 1.5 in.

I was super disappointed that the beige on white didn't really come out that well =(


Gobble Gobble. hehe. Cut at 1 in.


< so sad you can't really see the 'hello'!!!


Christmas cards coming soon!!! so excited =)
I am also ordering more supplies from Joann...... woohoo!

Monday, November 14, 2011

My First Thanksgiving Card

My exciting news for the day:
A dear friend of mine asked me to make some bridal party thank you cards for her! I have so many ideas and am SO excited to get started!!!


Onto more...
This is my first Thanksgiving Card....Hope you guys like it; it is simple and cute =D

7X5 Card:


Materials used:
- Golden Yellow Cardstock: 10 X 7, folded and scored at 5
- Brown Cardstock: 6.75 X 4.75
- The Green Matstack Patterned paper
- Turkey Critter w/ hat cut at 4 in.
- Gobble Phrase cut at 1 in.


Gobble Gobble


Other Materials used:
- Celebrate it Ribbon: Valentine

Look out for my other Thanksgiving card!

I am also in the process of making Christmas Cards...I will probably create a Christmas Card Series in a week or so.... are you excited???

Friday, November 11, 2011

A Hint of Red for Romance

11.11.11

Not only is this date cool, it also marks me and my sweetz (yes, I call him that. haha) anniversary!

I thought the theme this year should be black and white with a hint of red for romance =)
This 7 X 5 card was made using the Sweethearts cartridge.


Materials:
  • All Dolled Up Matstack- 6.25 X 4.25
  • Black Cardstock- 10 X 7, scored and folded down middle
  • Red Cardstock- 6.75 X 4.75
  • Champagne Glasses- Cut at 3 in
  • Square backgrounds- black @ 3 X 3.5 & white @ 2.75 X 3.25
  • Happy Anniversary- Cut at1.5 in w/ shadow


A simple "Love You" will always do.


<-- dont you just love the glitter in the champagne??


Other materials used:
- Black satin ribbon
- TPC Studio stamps: Greetings


While I was pretty happy with the final results, I was also a little disappointed that the red "Happy Anniversary" was a little hard to read. What colors would you suggest instead for the text, or do you think the red is actually a good choice?

Thanks for stopping by and feel free to leave a comment! =)

-Dee

Wednesday, November 9, 2011

Series of Birthday Cards Part III

Sorry for the long delay~ I haven't been feeling that well the past few days......but....

Finally! Here is the last part to my series of birthday cards of the week:


- Recollections cardstock:
tan @ 8.5in X 5.5 in (folded down the middle)
hot pink @ 1.5 in X 5.25in
- Nana's Kids Matstack: 3 in X 5.25 in
- Bear critter: cut at 3.75 in.


In the end, I decided the card would look a lot cuter with a bear balloon (cut at 3 in.)

Other Materials used:
- Essentials ribbon
- Studio g stamps

Thanks for visiting!

psst...
Anyone skipping the Thanksgiving cards and moving straight to the Christmas cards?
I made a list today of how many Christmas cards I would need to make this year... so excited to get started =D

Friday, November 4, 2011

Series of Birthday Cards Part II


Here is the second birthday card~

 A Cute Lady Bug:


- Recollections cardstock:
hot pink @ 8.5in X 5.5 in (folded down the middle)
light pink @ 1.5 in X 5.25in
- Nana's Kids Matstack: 3 in X 5.25 in
- Lady Bug critter: cut at 3.75 in.


< ignore my finger, haha.

Other materials used:
- Recollection edge punch
- Celebrate it Ribbon: Fit to be tied
- TPC Studio stamps: Greetings
- Studio g stamp (bday cake w/ candles) 

Hope you all have a great day =)

Look out for part III! 

Thursday, November 3, 2011

Series of Birthday Cards Part 1

I haven't made any birthday cards recently and now I've made 3. haha

These are all from the Create a Critter Cartridge, which is the cutest cartridge I own so far.
They have so many different critters and accessories to chose from!

I am trying to post better details on how I make my cards... this post will include measurements.

Here is the first one:

 A 'wintery' birthday card:


- Recollections cardstock:
light blue @ 8.5in X 5.5 in (folded down the middle) White  @ 2in X 5.25in
- Citris Matstack: 3.75in X 5.25 in
- Penguin critter: cut at 3.75 in.


I love the color snow flake ribbon!
It is getting colder and colder where I'm at and I am falling in love with the winter spirit (even though I hate the cold, haha)

Other materials used:
- American Crafts Ribbon: Snow Flakes Satin
- TPC Studio: Greetings stamp

Stay tuned for the next few cards!

Sunday, October 30, 2011

Versatile Cards

Card update!

I haven't really had any cricut card ideas lately so I decided to make cards that are a bit more versatile.


I know the summer season has ended but I couldn't resist this cute hat!
Materials used:
- Cricut Cartridge Forever Young
- Recollection Cardstock (squared pattern and basic colors)
- Nana's Kids matstack
- Recollections Floral Embellishment
- Colorbok Mini Brads
- Celebrate it ribbon: Fit to be Tied
- Studio g Stamp

anddddddd I was also feeling girly:


Materials used:
- Cricut Cartridge Forever Young
- Recollection Cardstock (squared pattern and basic colors)
- Nana's Kids matstack
- Celebrate it ribbon: Whimsey Cottage
- Essentials Ribbon: White
- Studio g Stamp

I am currently working on more cards! I have some birthday ones coming up!

-Dee